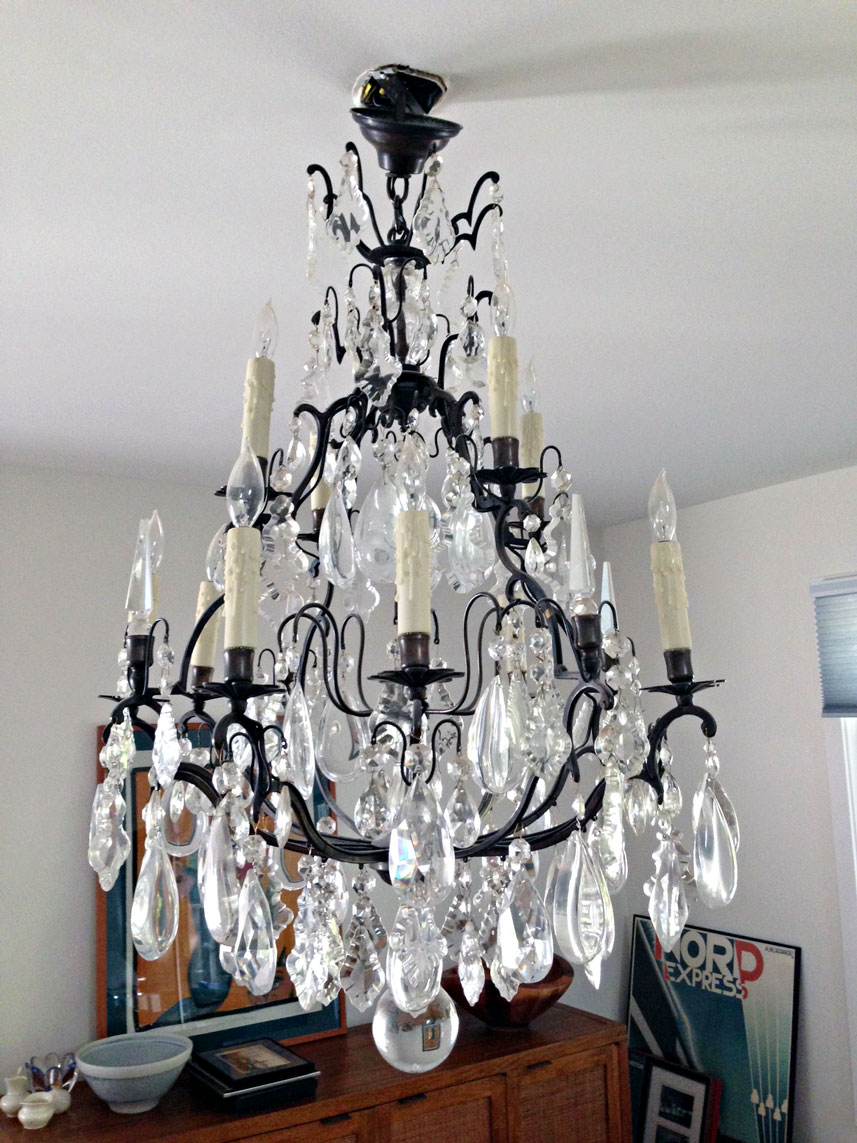
We inherited this chandelier when we bought our house. Nice, but not really our style. I believe in recycle, reuse and “reward” so I posted it on Craigslist. It ended up selling for $280 to a man from Brooklyn, NY. Yes, Brooklyn. He was in the Philadelphia suburban area on a buying sweep. I’m sure it ended up at Brooklyn Flea or in an antiques/collectible shop. But ya know, I often wonder. Who’s living with my stuff now?
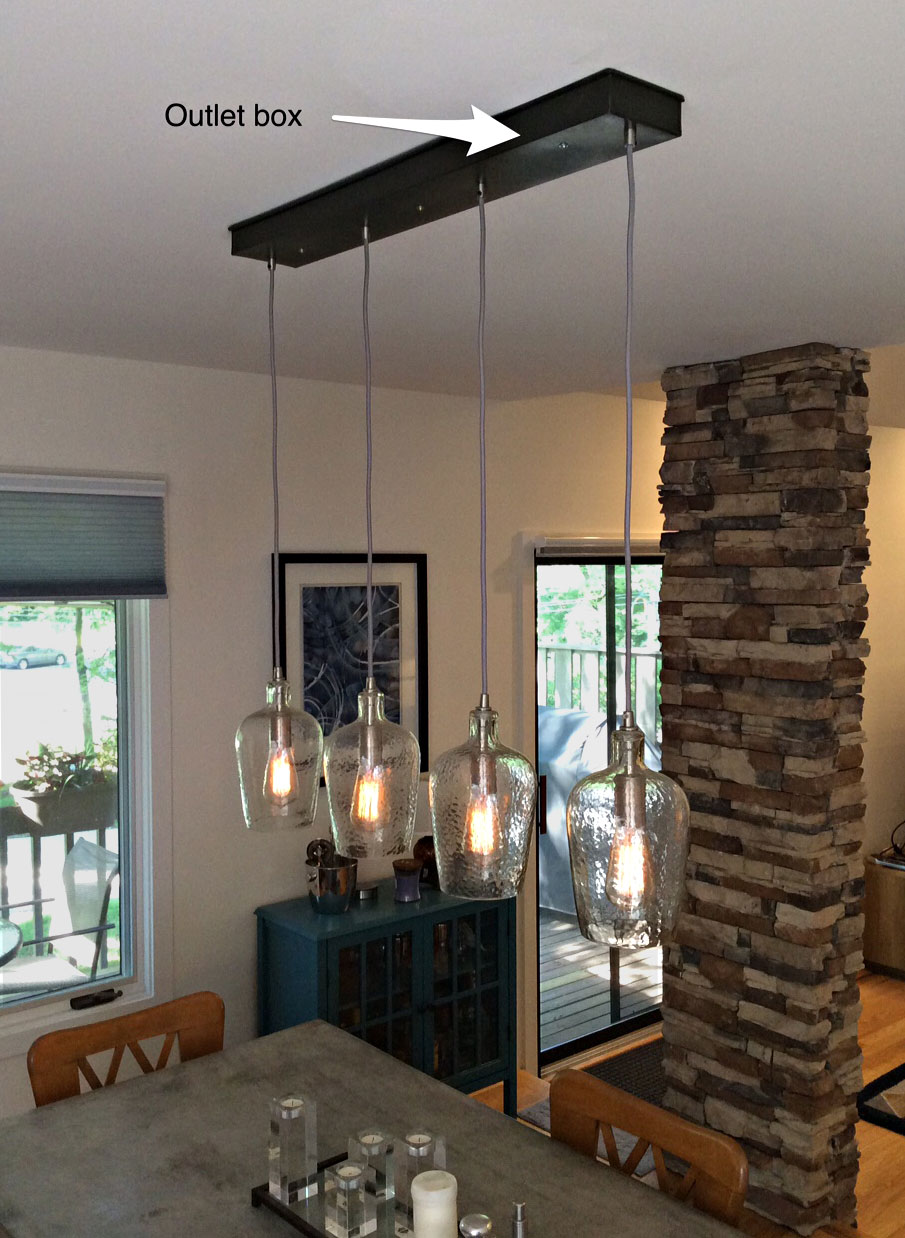
Affordable industrial chic chandelier.
Now I needed a new chandelier. I searched for an affordable industrial chic chandelier to accompany our concrete dining room table. Everything was either too modern, too big, over designed or too expensive. Also, I had a unique situation because the outlet box wasn’t centered over the table.
Off center. No problem.
This is the second house I’ve lived in where the position of the dining room chandelier outlet box is in the center of the room. My dining room table is OFF center. So I devise a solution to this problem. And it doesn’t involve an electrician ripping up the ceiling to move the outlet box. By creating my own lighting canopy I was able position the fixture OFF center, hide the pendant wiring AND cover the outlet box.
Light fixtures aren’t complicated. They consist of a bulb, socket and wire. The rest is dressing.

WHAT YOU’LL NEED
3-4 pendant lights
Something to use as a lighting canopy. It should be metal.
Drill and drill bits
Electrical tape and wire connectors
Washers
Screws and anchors
Screwdriver
Measuring tape
Another set of hands
First, I started shopping for affordable pendant lights. I chose these from Lowes. The globes are clear and they have an industrial chic style. Also, light shines down with these pendants. ADVICE: Go with white or clear. I once made the mistake of buying a pendant with an amber colored globe. It was like eating with a bug light hanging over the table.

Next, I had to find a suitable solution for a lighting canopy (the part which houses the wiring). I imagined a metal boot tray. I started scouring the internet. No luck. Then I came across these zinc finish metal trays at Terrain’s website. Perfect! (Terrain is in Glen Mills, PA and Westport, CT. It’s worth a visit just for ideas.) I bought the medium tray. It’s metal, AND the style compliments the pendant fixtures. I had my components so I was ready to start.

Instructions
First… turn the power off at the breaker box.
AND
This is a two person job.
First, measure the diameter of the pendant. Add to the diameter an allowance of space for the pendants to hang side by side. Drill holes for the pendant cords.
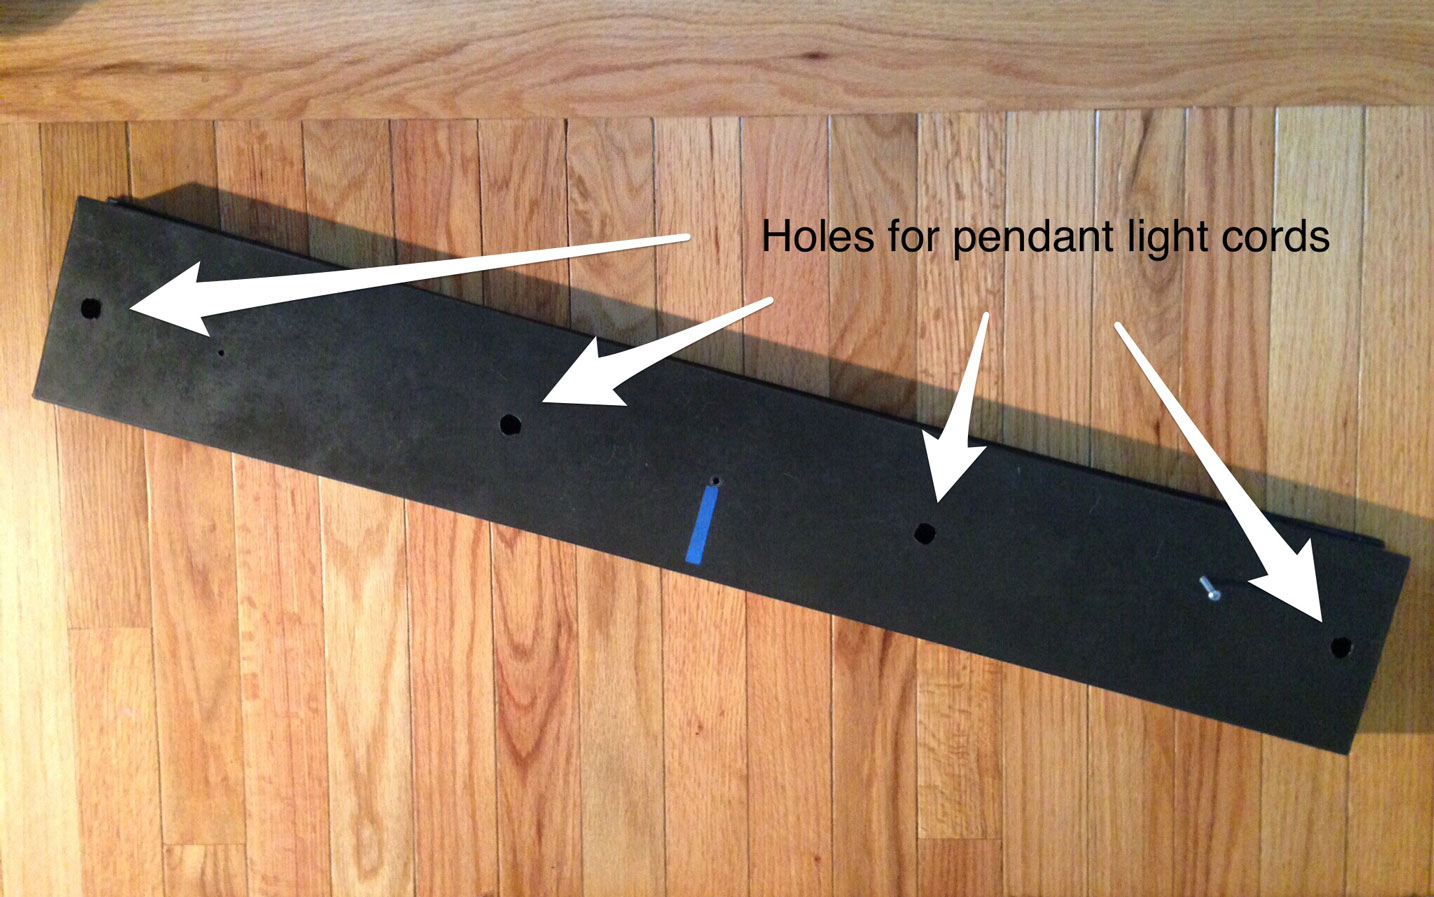
Drilled three additional smaller holes. One to secure the chandelier to the outlet box and two to secure the fixture to the ceiling. Preferably, secure to studs. If not, be sure to use anchors.
Depending on the new position of your fixture, you may secure the lighting canopy to the outlet box with a hole in a different position. But I recommend at least three holes to secure the canopy to the ceiling.

Feed the pendant wire through the pendant light cord holes. Decide on the desired length of the pendant cords. Generally, approximately 30 to 34 inches over a table with an 8 foot ceiling height is appropriate. Use a washer and tighten the nut at the desired cord length inside the tray. Then tighten the couplings on the opposite outside. Do this with all the pendants.

Splice the pendants in parallel (you’ll probably want to cut the excess pendant cord) and wire them to the box with electrical tape and wire connectors. You’ll need help with this. One person holding the fixture while the other connects the wires.
While holding the fixture in place, screw the canopy into the outlet box and the remaining two screws into the ceiling anchors.
I recommend Edison bulbs to complete the industrial chic look. They range from $4-10 a bulb. 1000bulbs.com is a good online source for these.