A simple outline around a picture can make the difference between “looks good” and “looks great”.
The BIG frame up
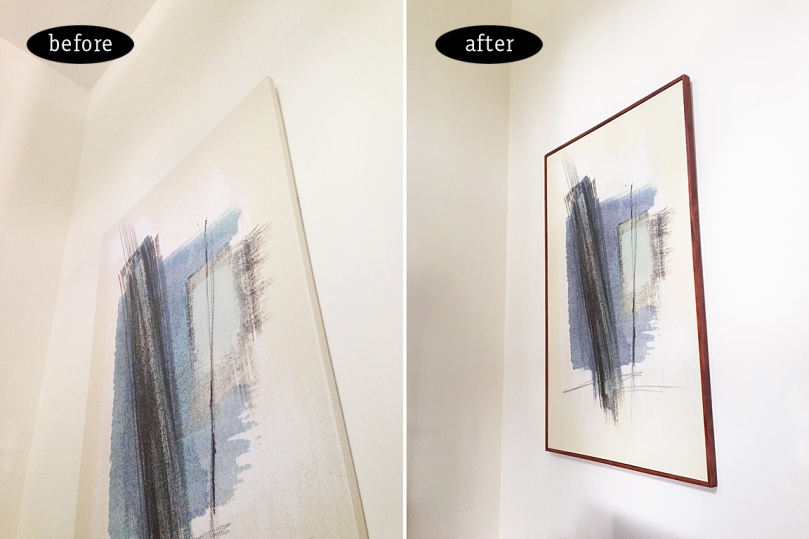
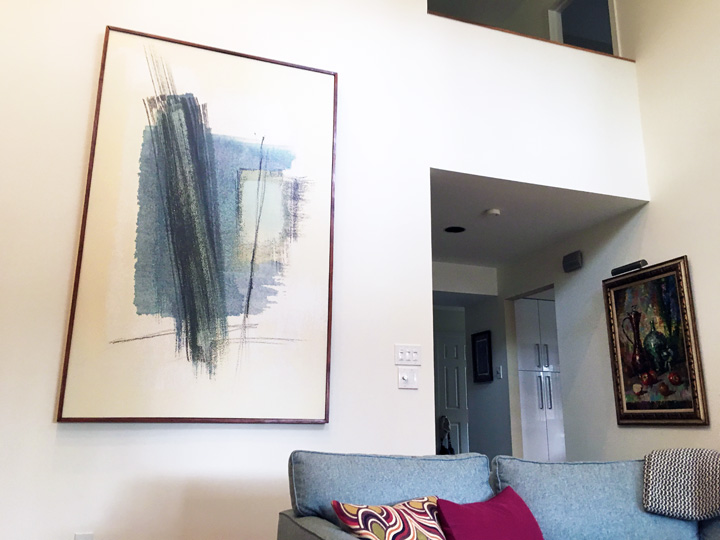
We needed some big impact in our living room. I mean, BIG. We found this oversized abstract wall art from West Elm. At seven foot tall, it had the presence we needed for our 18 foot wall. The West Elm wall art looked good but I knew it could look great. On a white wall the art didn’t pop. What it needed was a big outline on that big white wall. It needed a frame. A simple project with a lot of impact.
WHAT YOU’LL NEED
Poplar wood – Poplar wood is a good affordable choice because it typically has a straight, uniform grain which is good for staining. Choose a size that proportionately fits the canvas. For my large canvas I used 1 x 3 poplar.
Miter box and saw
Wood stain, polyurethane, steel wool and disposable foam brushes
Panel nails and hammer
Measure the length you will need for the top, bottom and sides. Measure each separately. Each sided may be slightly different.
Cut each piece with a miter box at a 45 degree angle. Make sure you cut the angles correctly. It’s easy to have a dyslexic moment and cut the angles wrong.
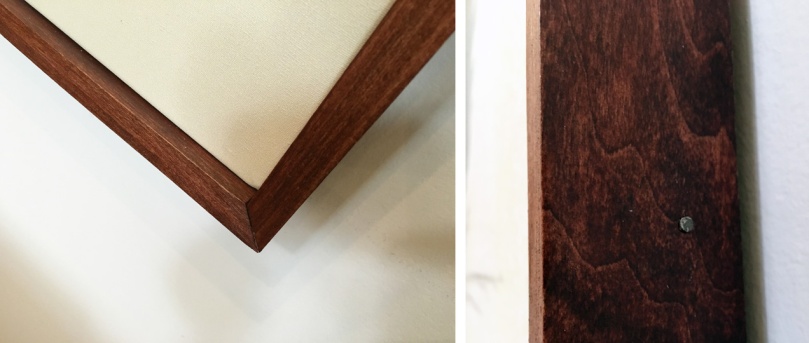
Mark the ends of each piece top, bottom, left and right. This will be helpful when putting the frame together. Stain both sides of each piece. After the stain has dried coat both sides of each piece with polyurethane. Three coats should be enough. Between coats lightly sand with steel wool to smooth the grain.
Lining up the mitered corners, nail each piece directly into the sides of the canvas.
That’s it!
Now our seven foot canvas is the focus on the wall instead of blending into the wall.
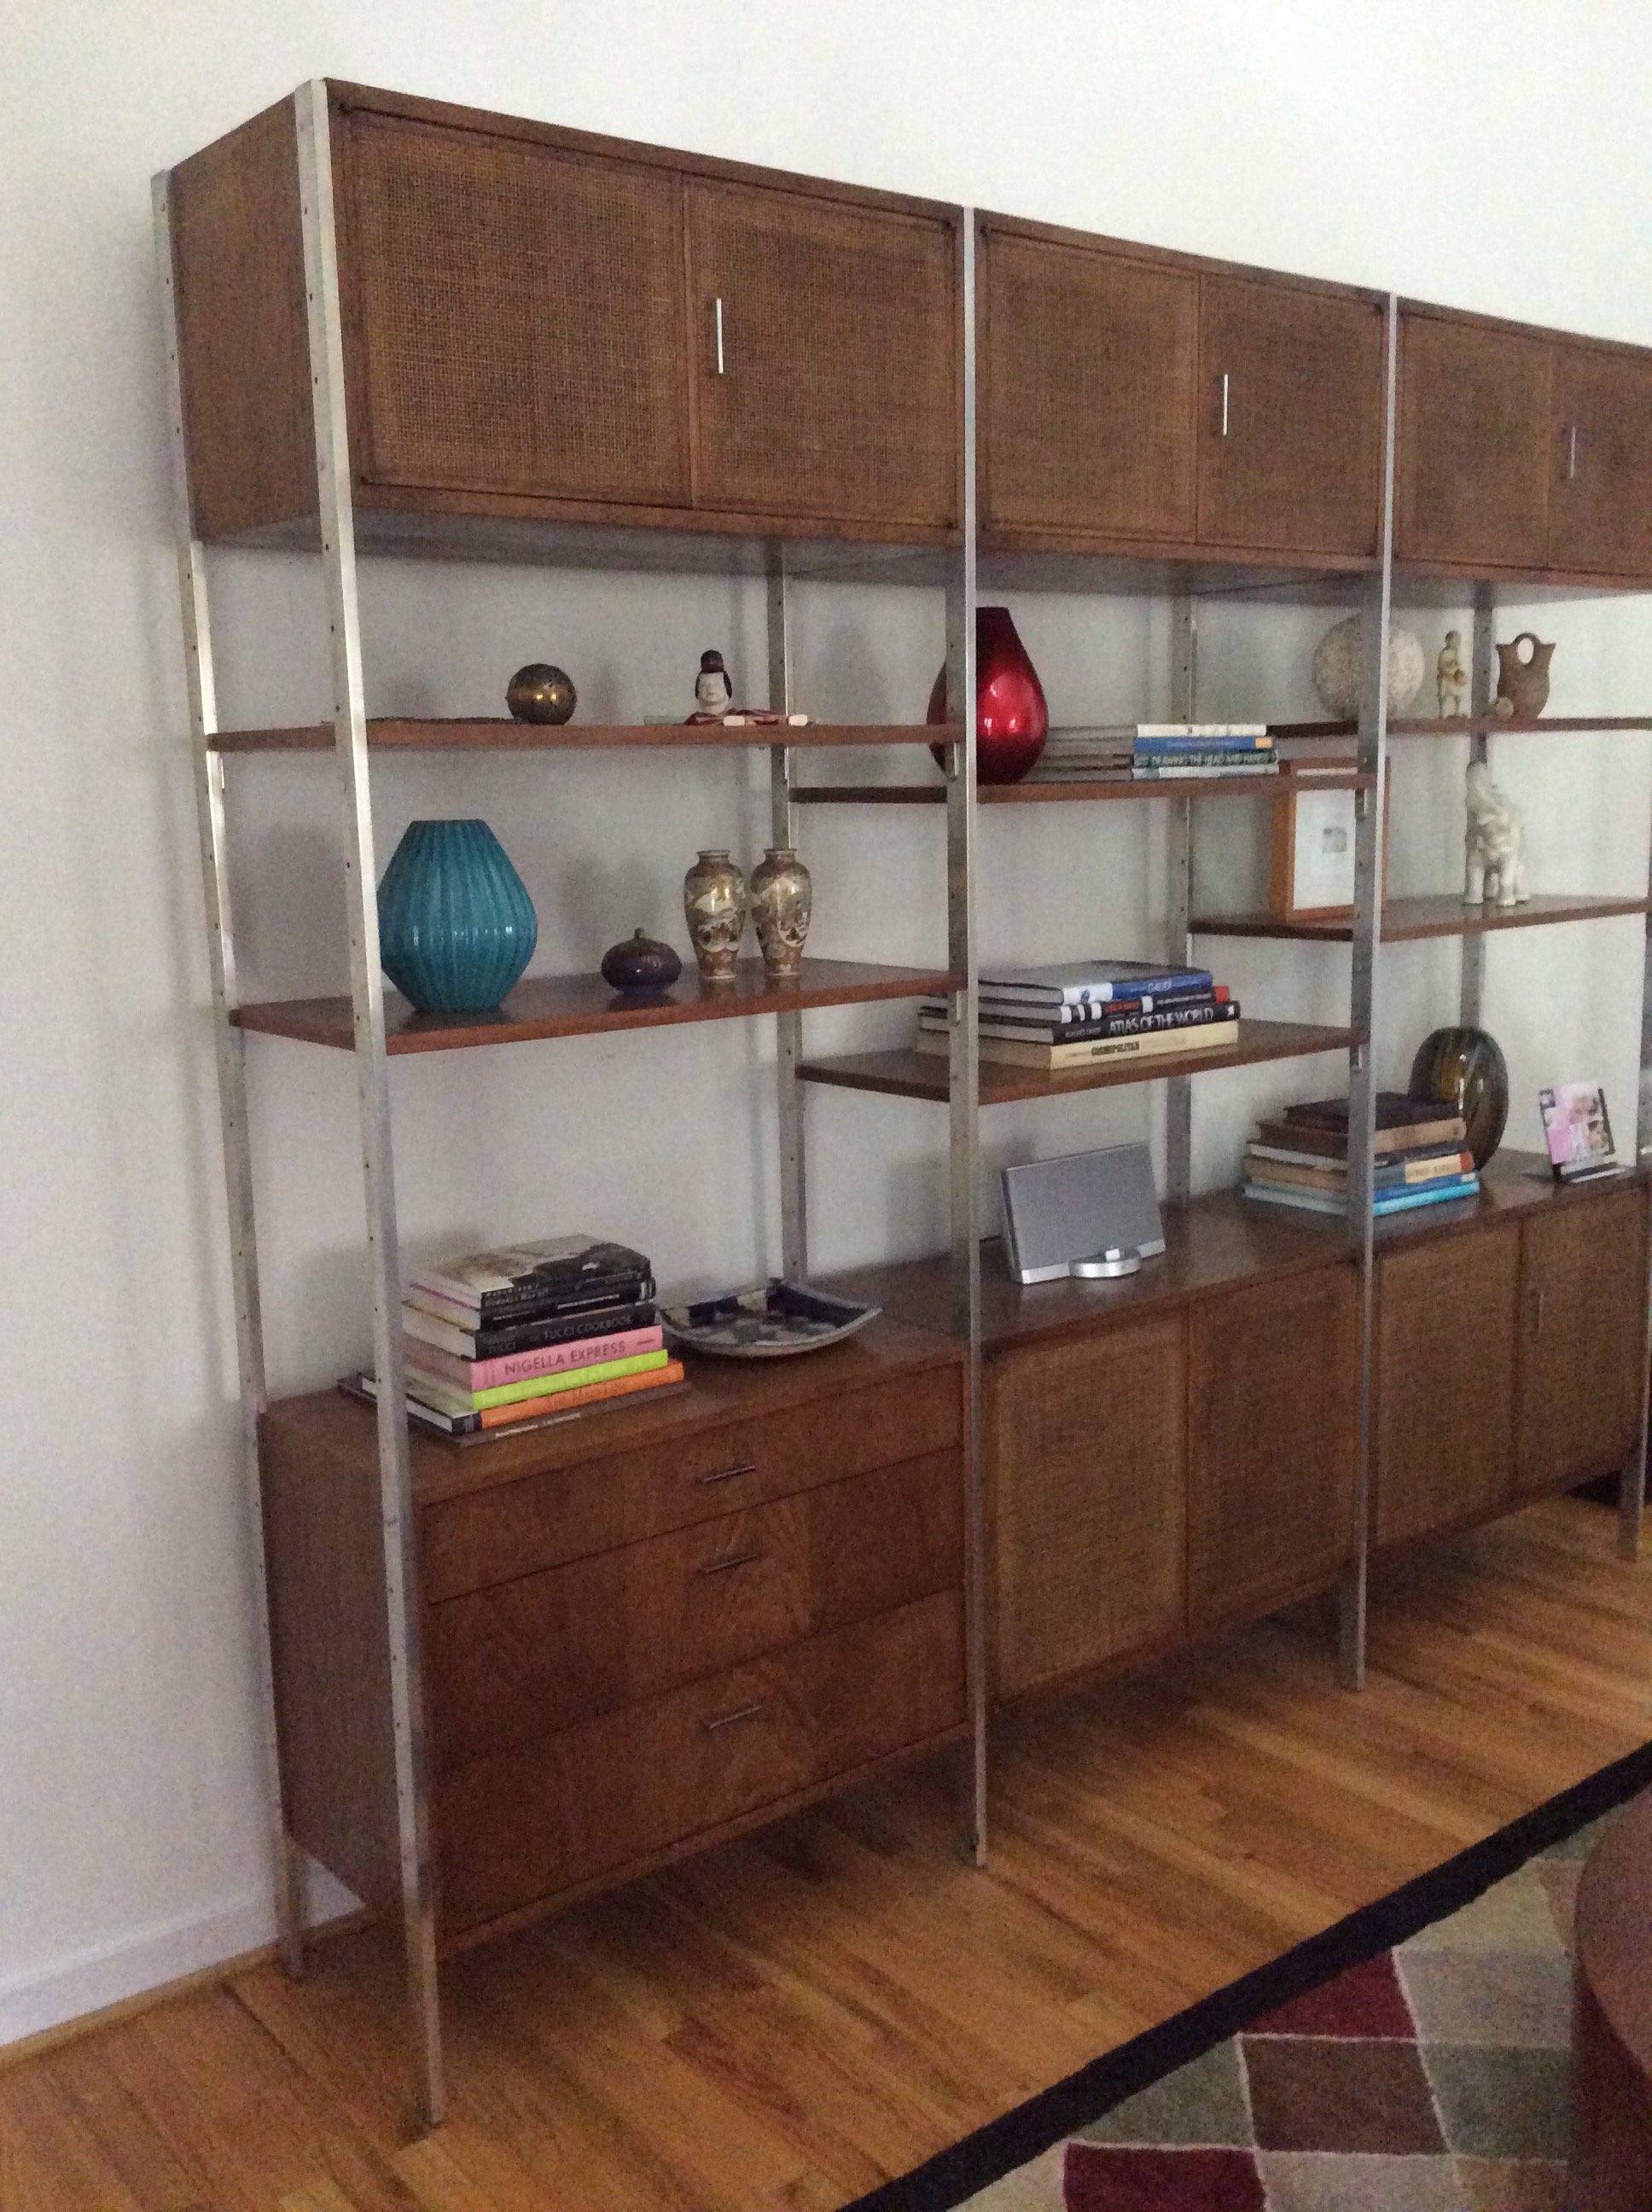
We bought this Mid-Century Modern modular shelving unit from the estate of the previous owner. It’s well-built, stylish AND practical. The rails are aluminum. The drawers are solid wood. The doors have rattan inserts. And, there’s lots of storage. I’m not a fan of clutter. I’m a fan of hiding clutter. I hide the dog toys in the bottom drawer on the left.
Our predecessor had the shelving unit upstairs. In order to move it downstairs to the living room it had to be taken apart and reassembled. “Modular” was not the word I used to describe the unit while moving it.
Binder screws.
I scrubbed 30 years of nicotine off the shelves. Polished the aluminum support rails. And then, went off to the hardware store to find binder screws to assemble the unit. Half of the binder screws were missing. The holes in the rails needed to line up perfectly with the holes in the cabinets in order to put the shelves together. Another two person job. The project that I said, was at best, 1-2 hours, took the entire day. Funny, that happens a lot.
Great! Love it… except. It looks underwhelming.
The shelves required some drama to show them off. At night, against an 18 foot wall, the shelves visually melted into the room. But with minimal cost and effort. And by adding background lights. The shelves now look rich and sophisticated.
Not too hot. And not too cold.
Lighting is an important component of design. Lighting design professionals understand the art and science of lighting. It can be used to create drama and add dimension. Retailers, designers and directors all use lighting to connect with audiences.
With lighting, knowing color temperature is important. Do you ever wonder why you look so bad under fluorescent lights? It’s because the least flattering light for your face is blueish light. It’s color temperature is cold. Fluorescent lights emit bluish/green light. This makes your skin tone look sickly and pale. This is useful information for your next selfie.
Lowel EDU: Lighting Resource Center
If you want to understand about the art and science of lighting, visit Lowel.
Drama, in the right places.
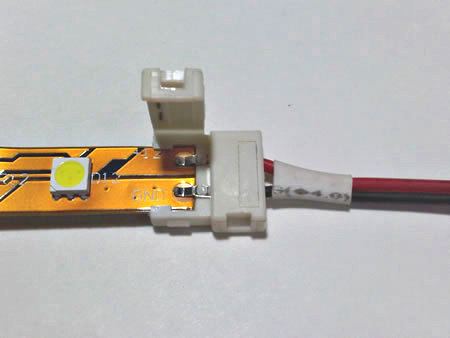
For this project, I used LED tape lights from LED Wholesalers. I taped the LED lights to the back of the shelving unit. They are 12 volt DC, 24 watt, warm white with a color temperature of 2700K. Warm lighting is a good choice for home lighting. It feels natural and comfortable.
These lights are cuttable, dimmable and have an adhesive back. They required a power adapter and connectors as needed. A touch sensitive dimmer switch is optional.
LED lights have come a long way in recent years. Partly due to the phasing out of incandescent bulbs. I recommend changing to LEDs throughout your home. You’ll save money, save the environment AND you can still look good. LEDs are affordable (they keep going down in price) and are readily available in warm white 2700K.
Instructions
LED 12 volt DC, 24 watt, warm white tape lights with a color temperature of 2700K and scissors.
Power adapter, connector and optional touch sensitive dimmer switch.
Tape lights come in different lengths. These lights can be cut with scissors every two inches for custom sizing. A variety of connectors can be added for different situations.
Peel off tape backing and stick in place.
Connect to connector or connectors.
Plug into the power adapter.
Plug into an outlet.
Optional: Connect the power adapter to a touch sensitive dimmer switch.
I love the way this turned out. This media unit needed a little help. The LED tape lights also compliment the two LED lamps.
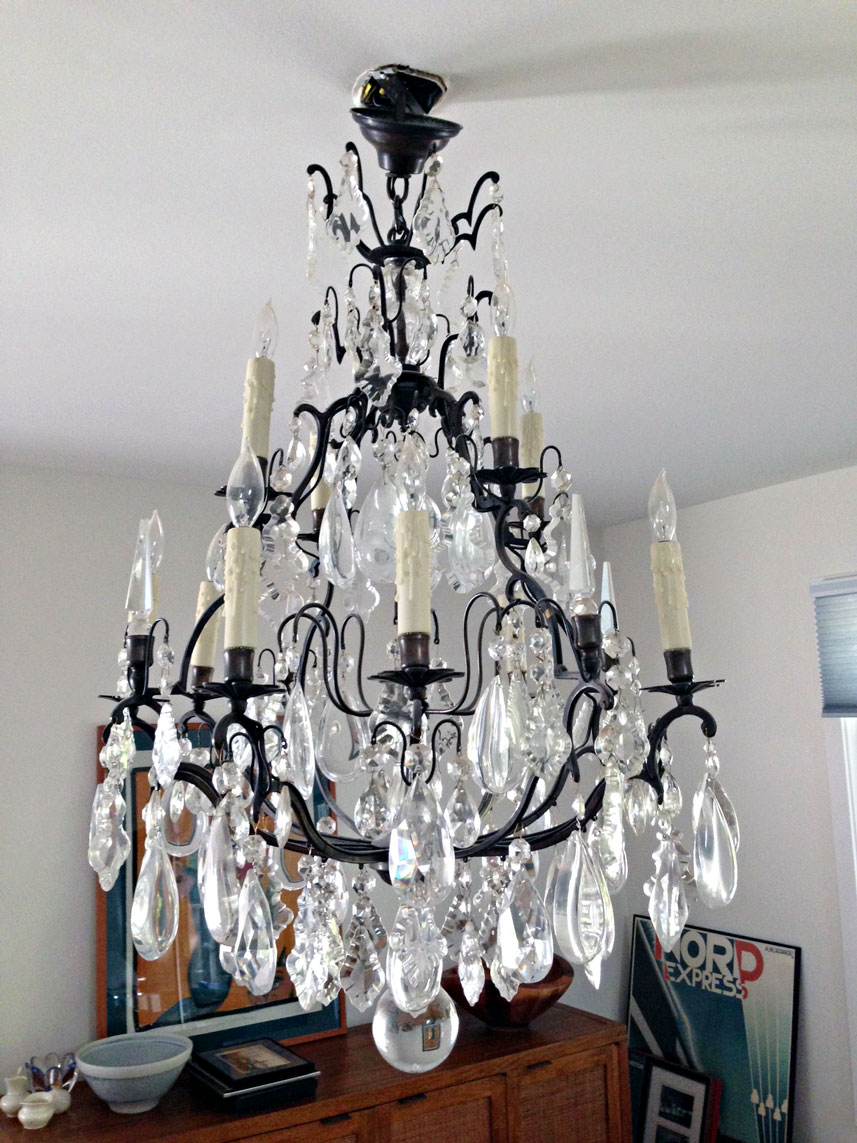
We inherited this chandelier when we bought our house. Nice, but not really our style. I believe in recycle, reuse and “reward” so I posted it on Craigslist. It ended up selling for $280 to a man from Brooklyn, NY. Yes, Brooklyn. He was in the Philadelphia suburban area on a buying sweep. I’m sure it ended up at Brooklyn Flea or in an antiques/collectible shop. But ya know, I often wonder. Who’s living with my stuff now?
Affordable industrial chic chandelier.
Now I needed a new chandelier. I searched for an affordable industrial chic chandelier to accompany our concrete dining room table. Everything was either too modern, too big, over designed or too expensive. Also, I had a unique situation because the outlet box wasn’t centered over the table.
Off center. No problem.
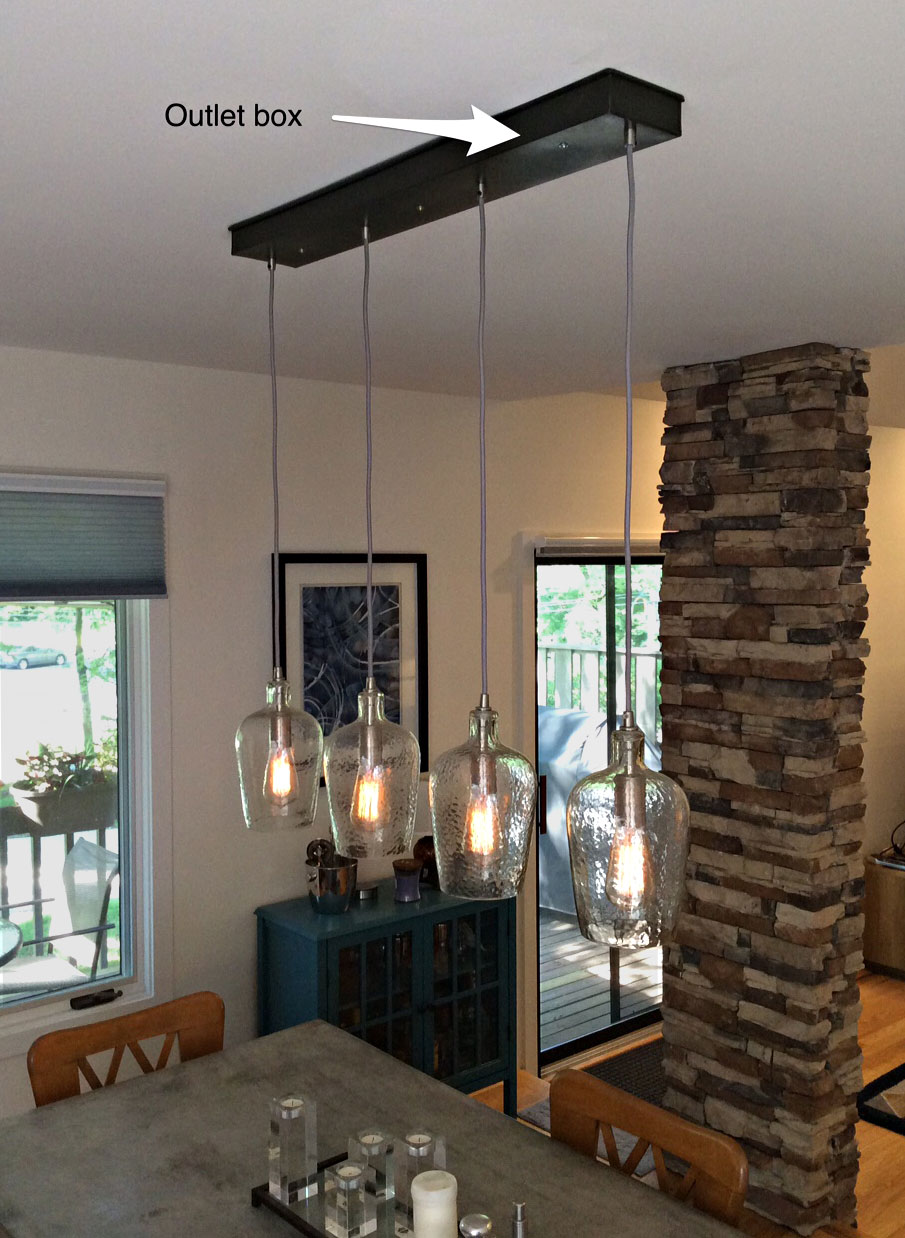
This is the second house I’ve lived in where the position of the dining room chandelier outlet box is in the center of the room. My dining room table is OFF center. So I devise a solution to this problem. And it doesn’t involve an electrician ripping up the ceiling to move the outlet box. By creating my own lighting canopy I was able position the fixture OFF center, hide the pendant wiring AND cover the outlet box.
Light fixtures aren’t complicated. They consist of a bulb, socket and wire. The rest is dressing.
WHAT YOU’LL NEED
3-4 pendant lights
Something to use as a lighting canopy. It should be metal.
Drill and drill bits
Electrical tape and wire connectors
Washers
Screws and anchors
Screwdriver
Measuring tape
Another set of hands
First, I started shopping for affordable pendant lights. I chose these from Lowes. The globes are clear and they have an industrial chic style. Also, light shines down with these pendants. ADVICE:Go with white or clear. I once made the mistake of buying a pendant with an amber colored globe. It was like eating with a bug light hanging over the table.
Lowes allen + roth Brushed Nickel Mini Pendant
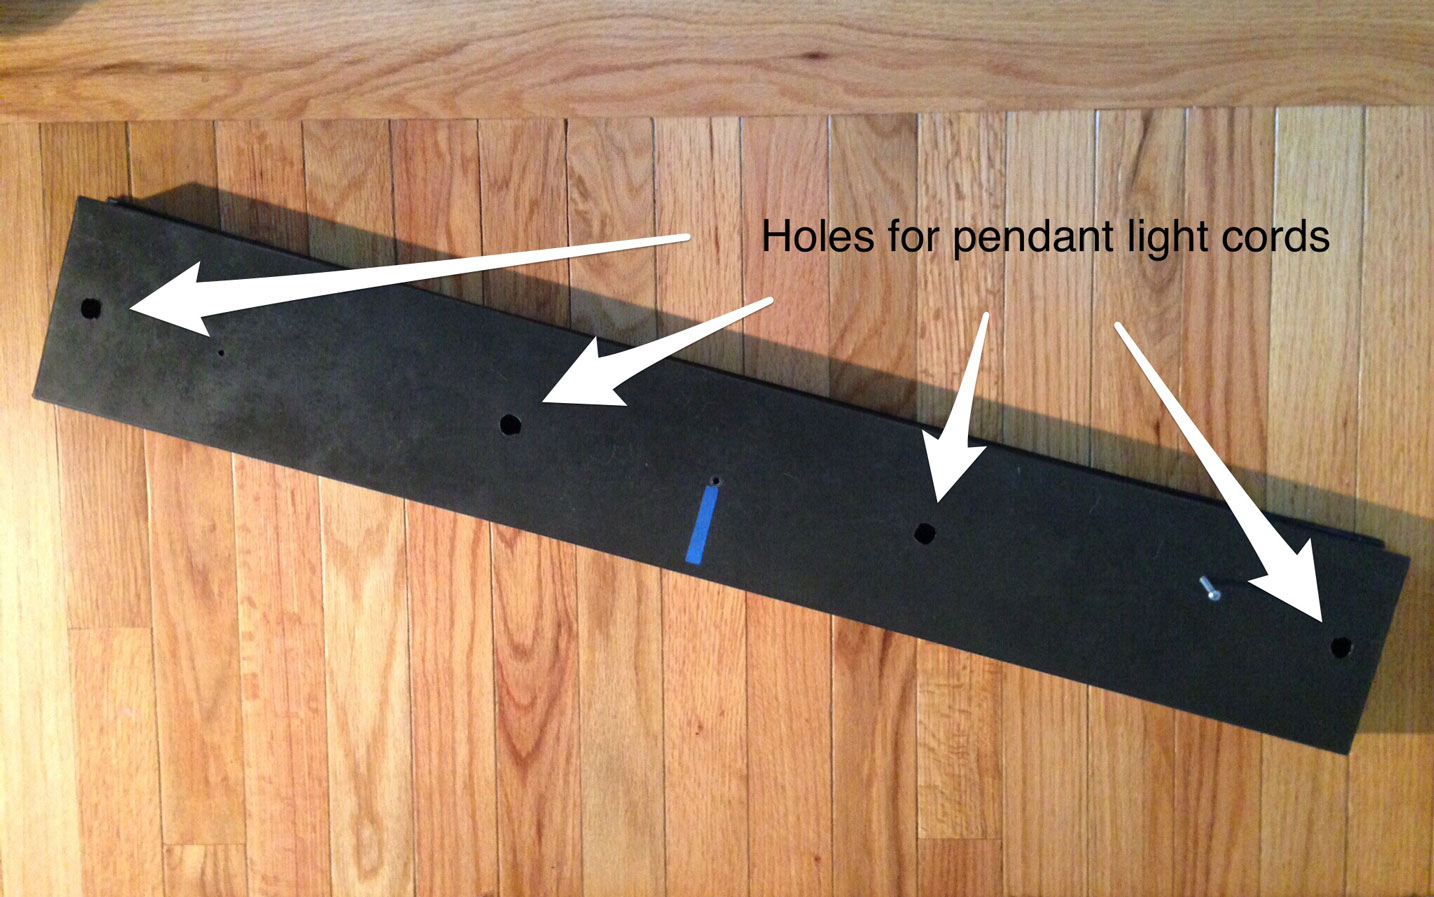
Next, I had to find a suitable solution for a lighting canopy (the part which houses the wiring). I imagined a metal boot tray. I started scouring the internet. No luck. Then I came across these zinc finish metal trays at Terrain’s website. Perfect! (Terrain is in Glen Mills, PA and Westport, CT. It’s worth a visit just for ideas.) I bought the medium tray. It’s metal, AND the style compliments the pendant fixtures. I had my components so I was ready to start.
Terrain Habit & Form Dark Zinc Rectangle Tray
Instructions
First… turn the power off at the breaker box.
AND
This is a two person job.
First, measure the diameter of the pendant. Add to the diameter an allowance of space for the pendants to hang side by side. Drill holes for the pendant cords.
Drilled three additional smaller holes. One to secure the chandelier to the outlet box and two to secure the fixture to the ceiling. Preferably, secure to studs. If not, be sure to use anchors.
Depending on the new position of your fixture, you may secure the lighting canopy to the outlet box with a hole in a different position. But I recommend at least three holes to secure the canopy to the ceiling.
Feed the pendant wire through the pendant light cord holes. Decide on the desired length of the pendant cords. Generally, approximately 30 to 34 inches over a table with an 8foot ceiling height is appropriate. Use a washer and tighten the nut at the desired cord length inside the tray. Then tighten the couplings on the opposite outside. Do this with all the pendants.
Splice the pendants in parallel (you’ll probably want to cut the excess pendant cord) and wire them to the box with electrical tape and wire connectors. You’ll need help with this. One person holding the fixture while the other connects the wires.
While holding the fixture in place, screw the canopy into the outlet box and the remaining two screws into the ceiling anchors.
I recommend Edison bulbs to complete the industrial chic look. They range from $4-10 a bulb. 1000bulbs.com is a good online source for these.
I love how this turned out. The pendant chandelier now hangs centered over the OFF center concrete dining room table.
Transform a Home Goods find into a sophisticated and modern mirrored tray.
Mirrored tray from Home Goods.
I love the look of mirrored trays. They add a little glamor and sophistication. They’re practical too.
This one came from Home Goods. It’s nice, but I wanted something a bit more sophisticated and interesting. This is “faux” decoupage. Why not real decoupage? So that’s what I did. Read how.